Cash Register Management
In the Cash Register section, you can manage the cash register settings used in your store. You can create new sessions to start transactions and manage cash register session history.
Cash register session settings can also be configured via the Admin Panel. Session names displayed in admin typically use the format: Admin Panel - [Store Name].
By default, the cash register session will automatically activate at 07:00 and automatically deactivate at 21:00. You can still change sessions manually as needed for operations.
1. Cash Register Page View
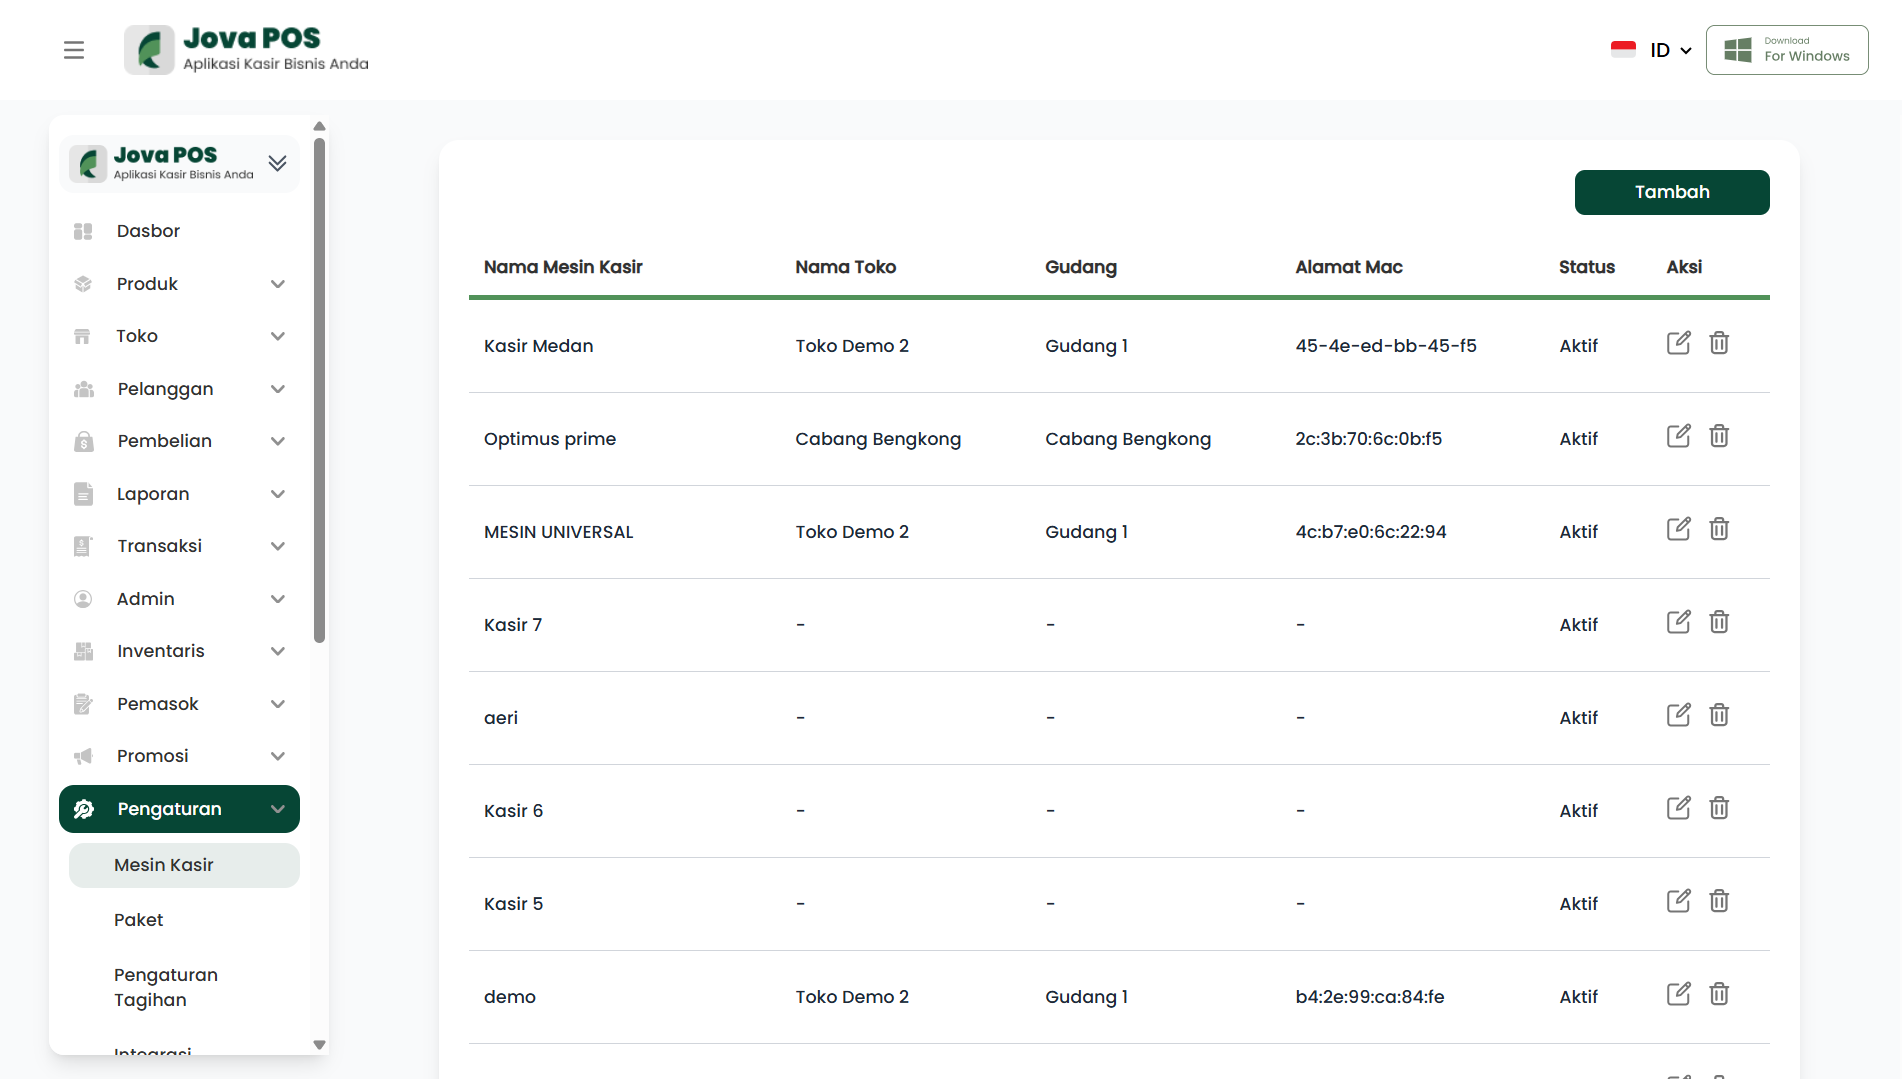
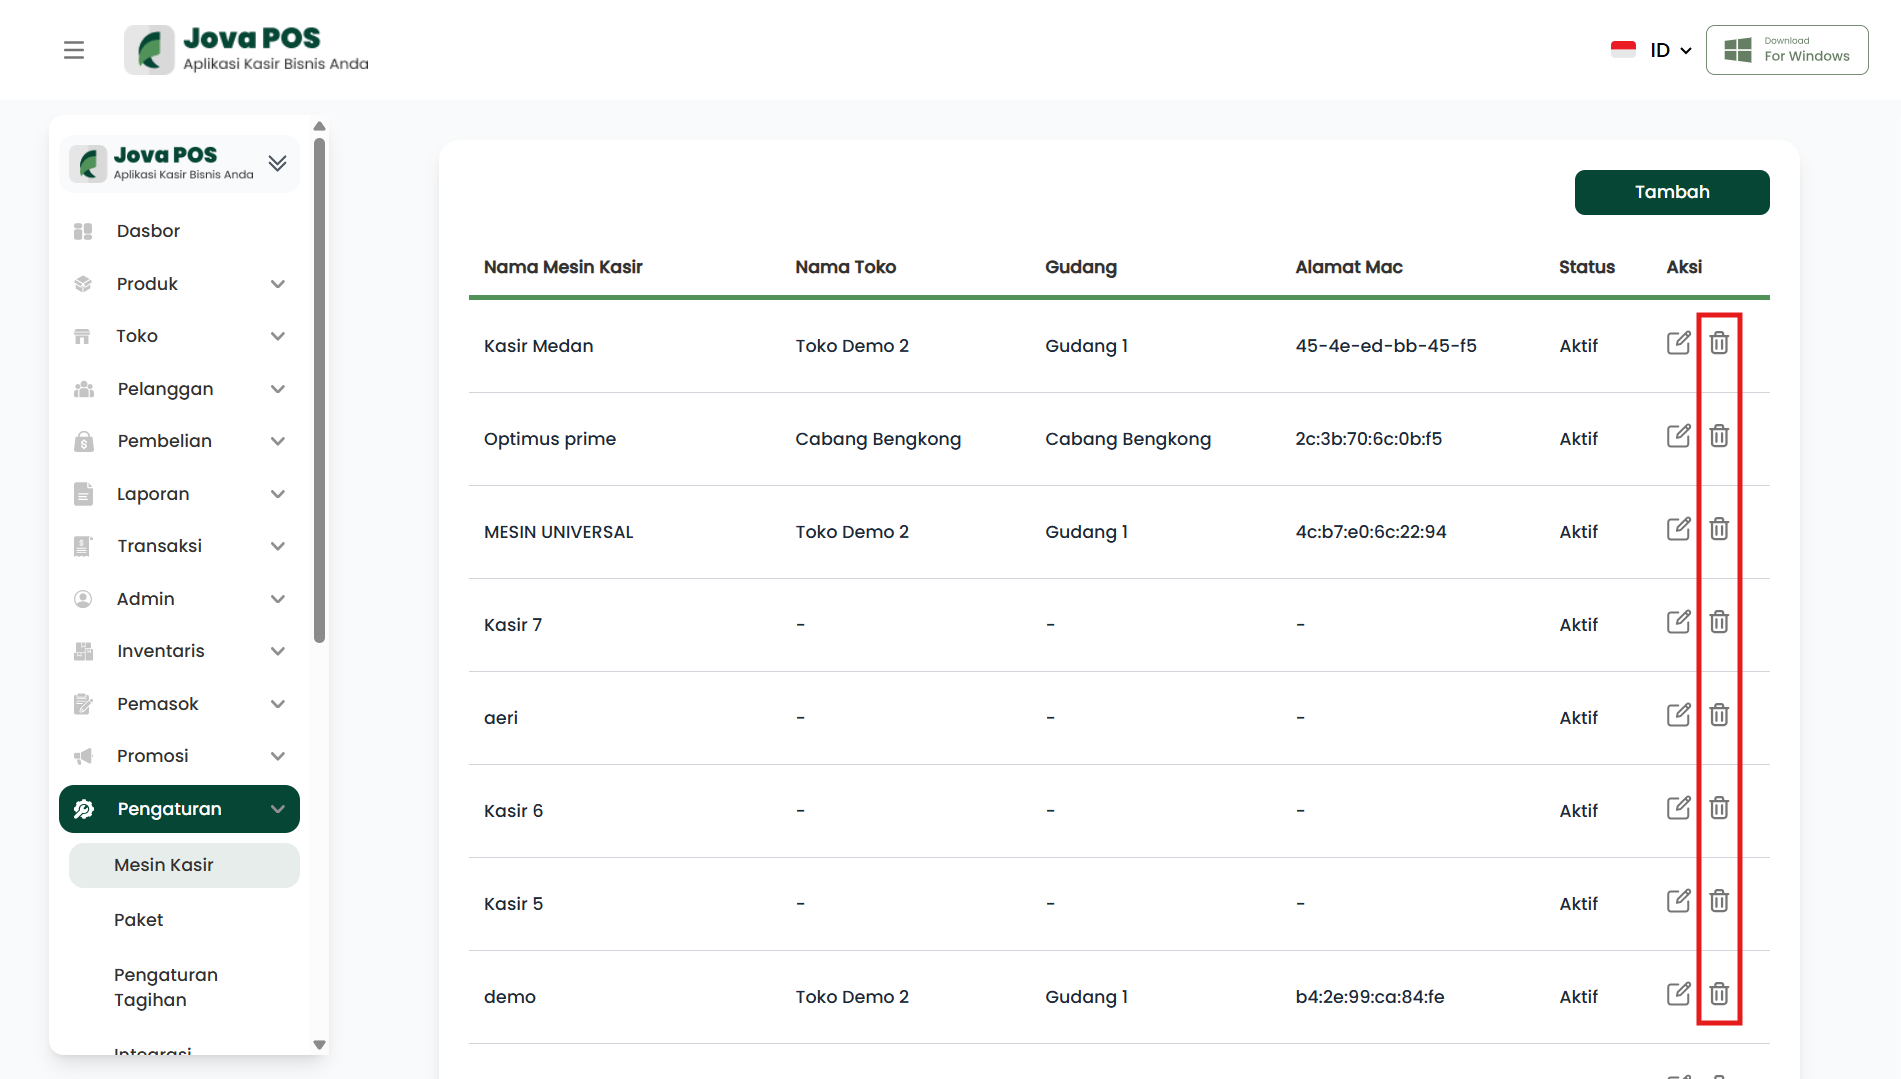
The Cash Register page displays the list of configured cash registers. You can see the cash register name, status, and manage session settings.
Cash Register Page View:
- Cash Register Name: The name of the cash register in use.
- Store Name: The store name associated with the cash register.
- Warehouse: The warehouse the cash register is connected to.
- MAC Address: The MAC address of the cash register.
- Status: Whether the cash register is active or not.
Example Display:
2. Creating a New Session
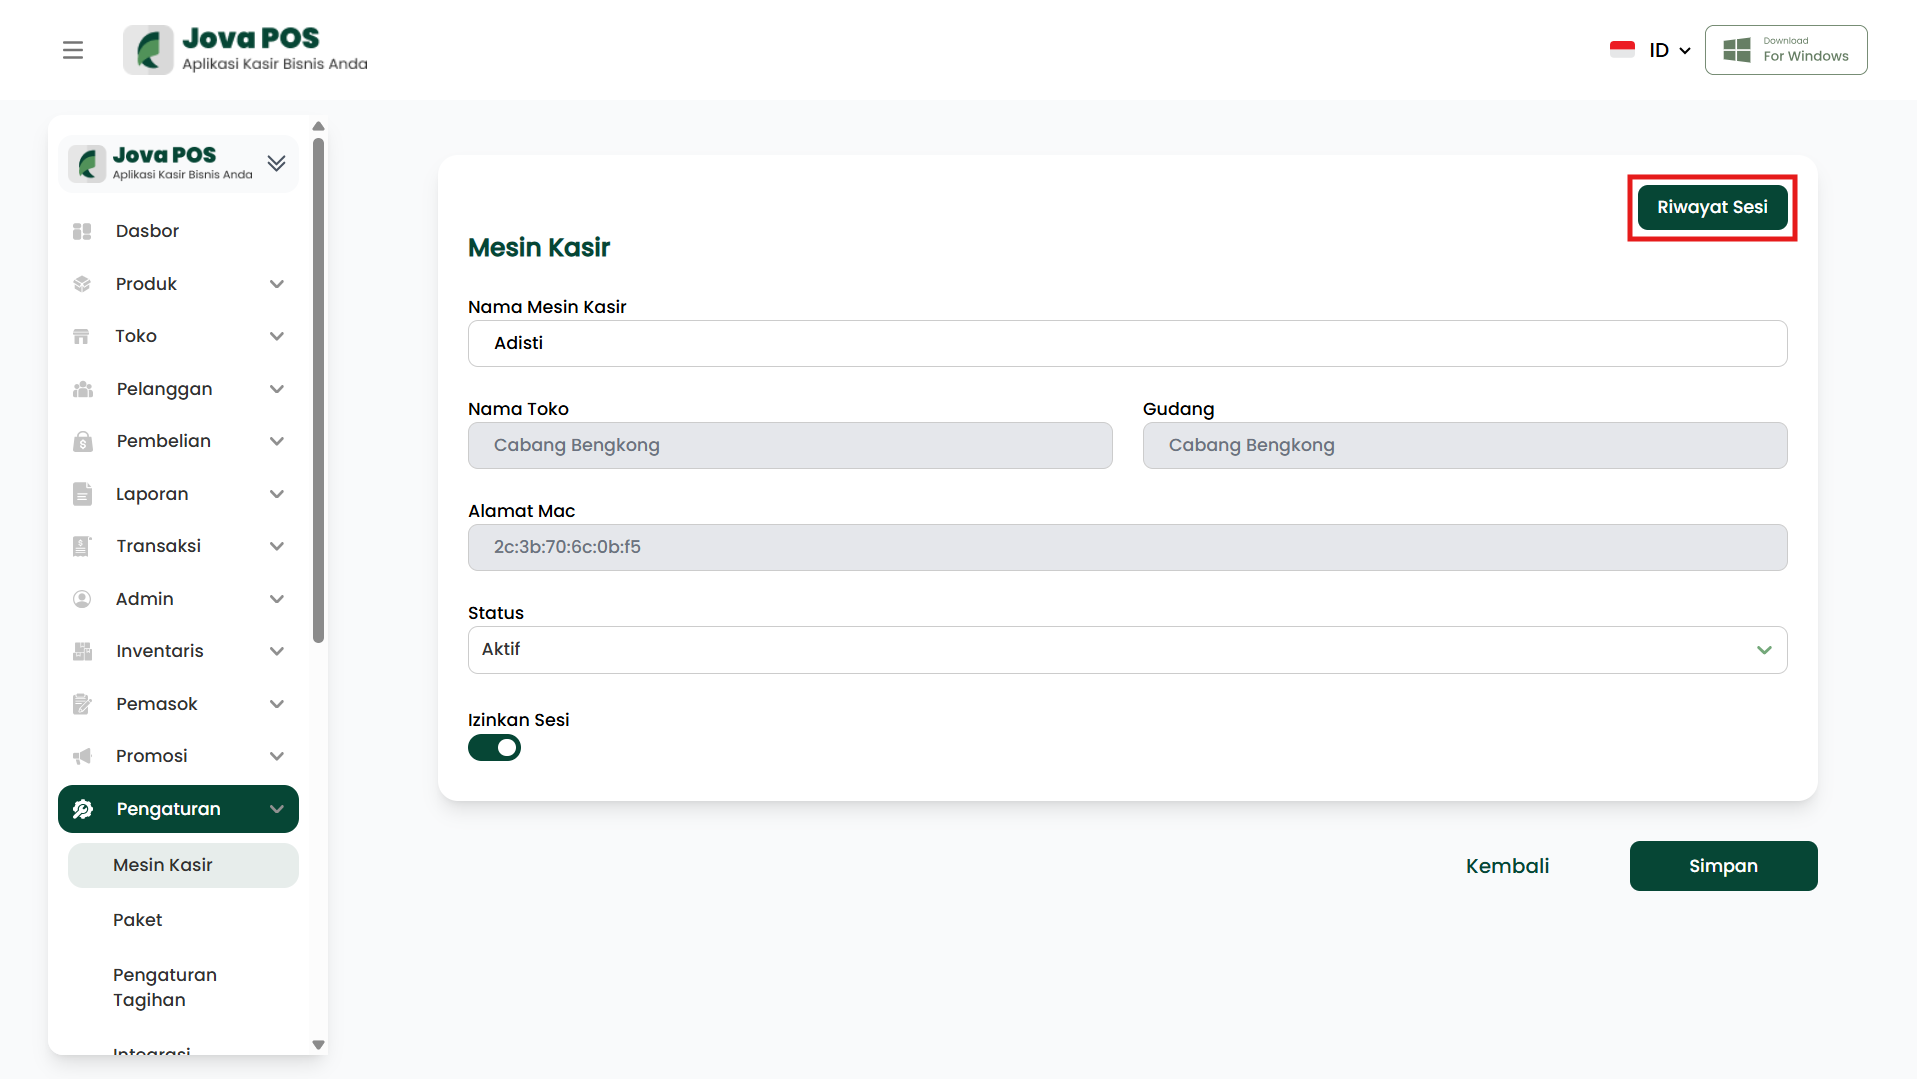
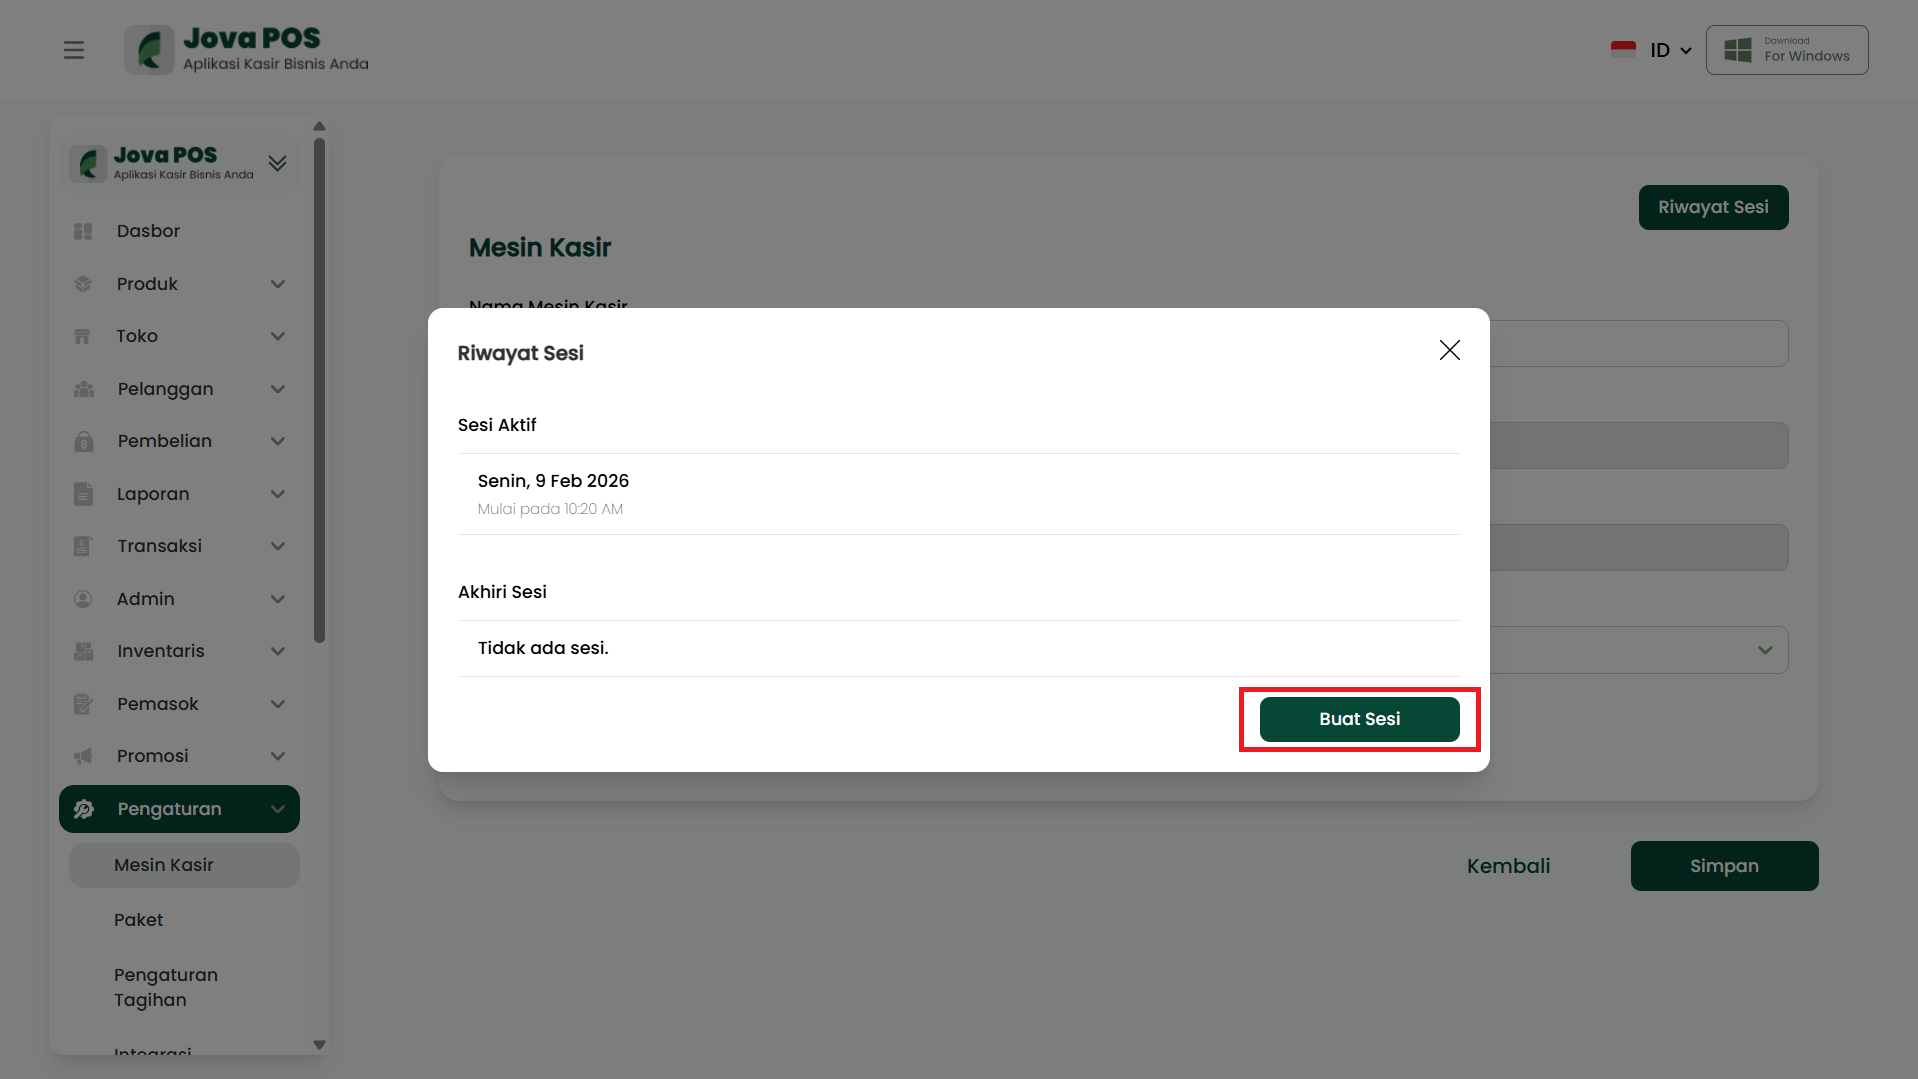
To start a new session, click the Create Session button located in the top right of the cash register page.
Steps:
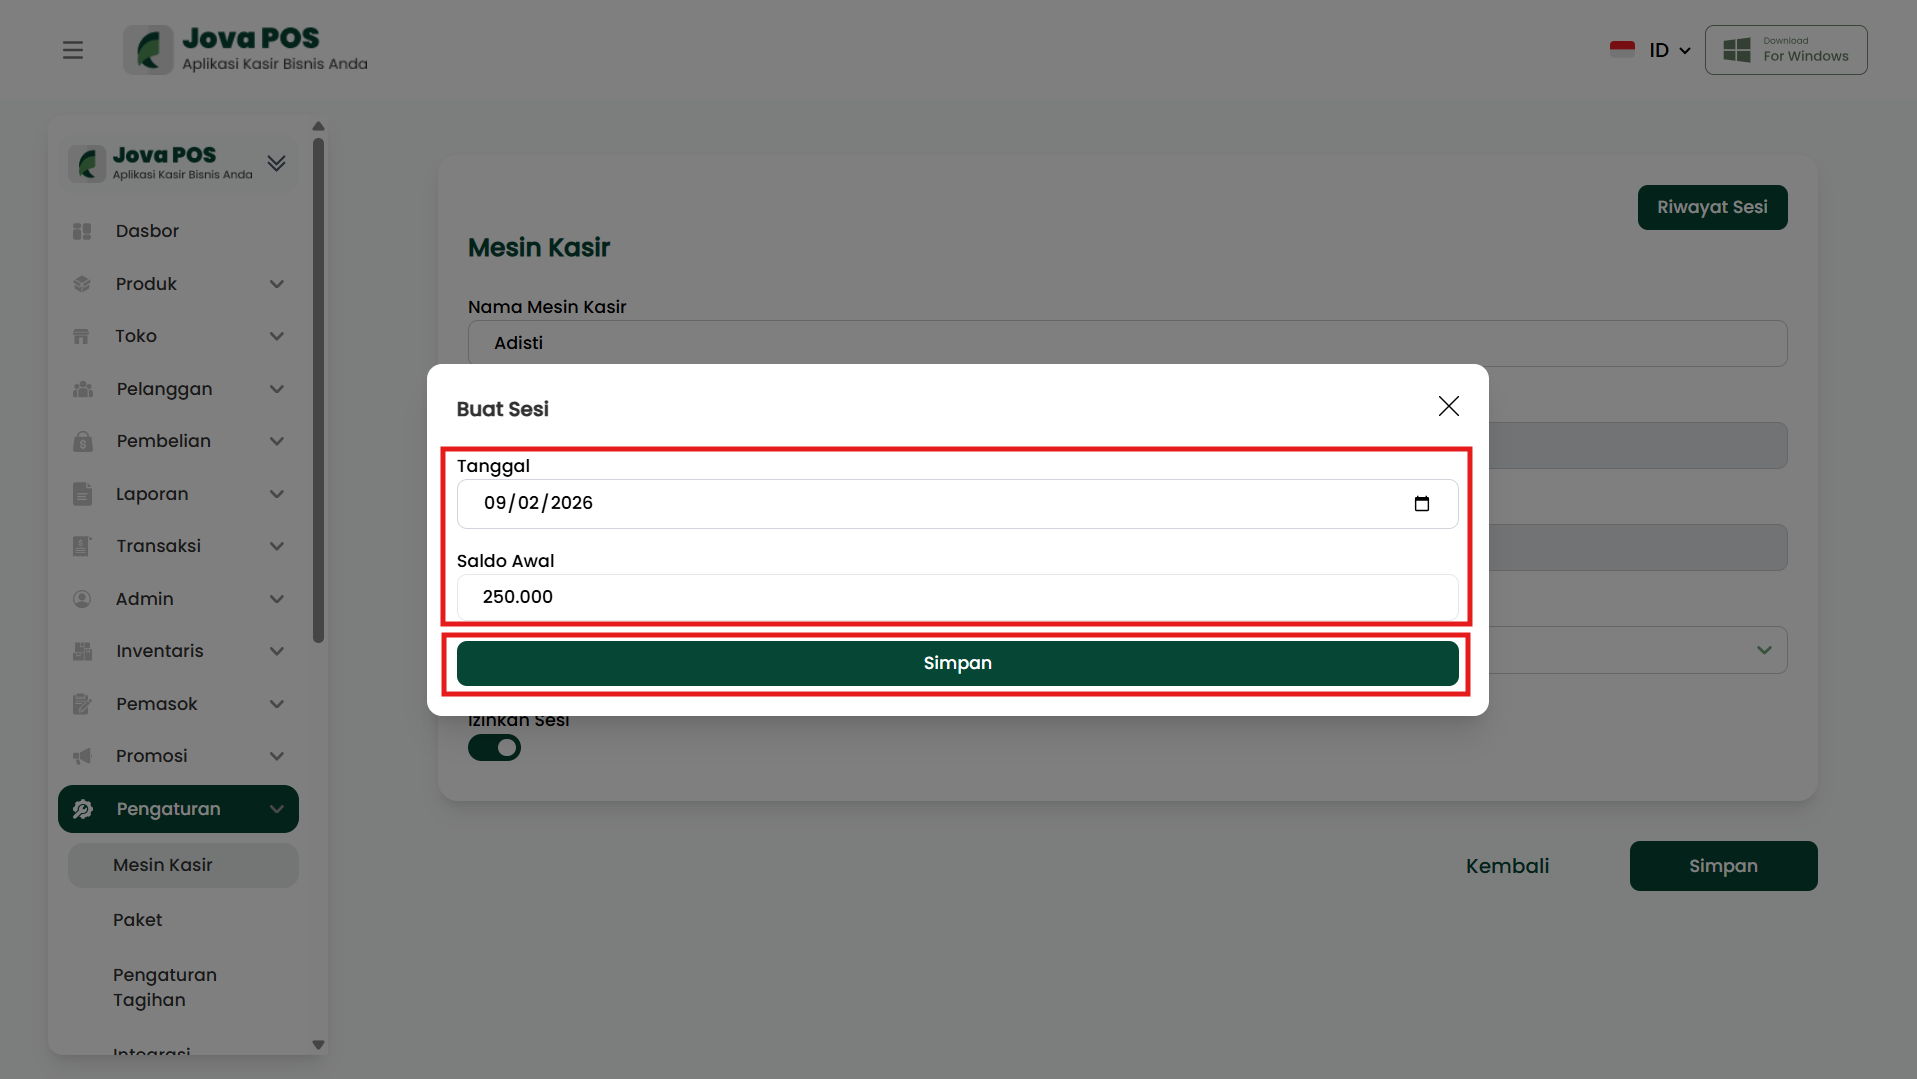
- On the cash register page, click the Create Session button.
- The form to create a new session will appear.
2.1 Filling in the Create Session Form
- Date: Select the date the session will start.
- Example: 09/02/2026.
- Opening Balance: Set the opening balance of the cash register.
- Example: 250.000.
- Click Save to save the created session.
Create Session Form View:
3. Session History
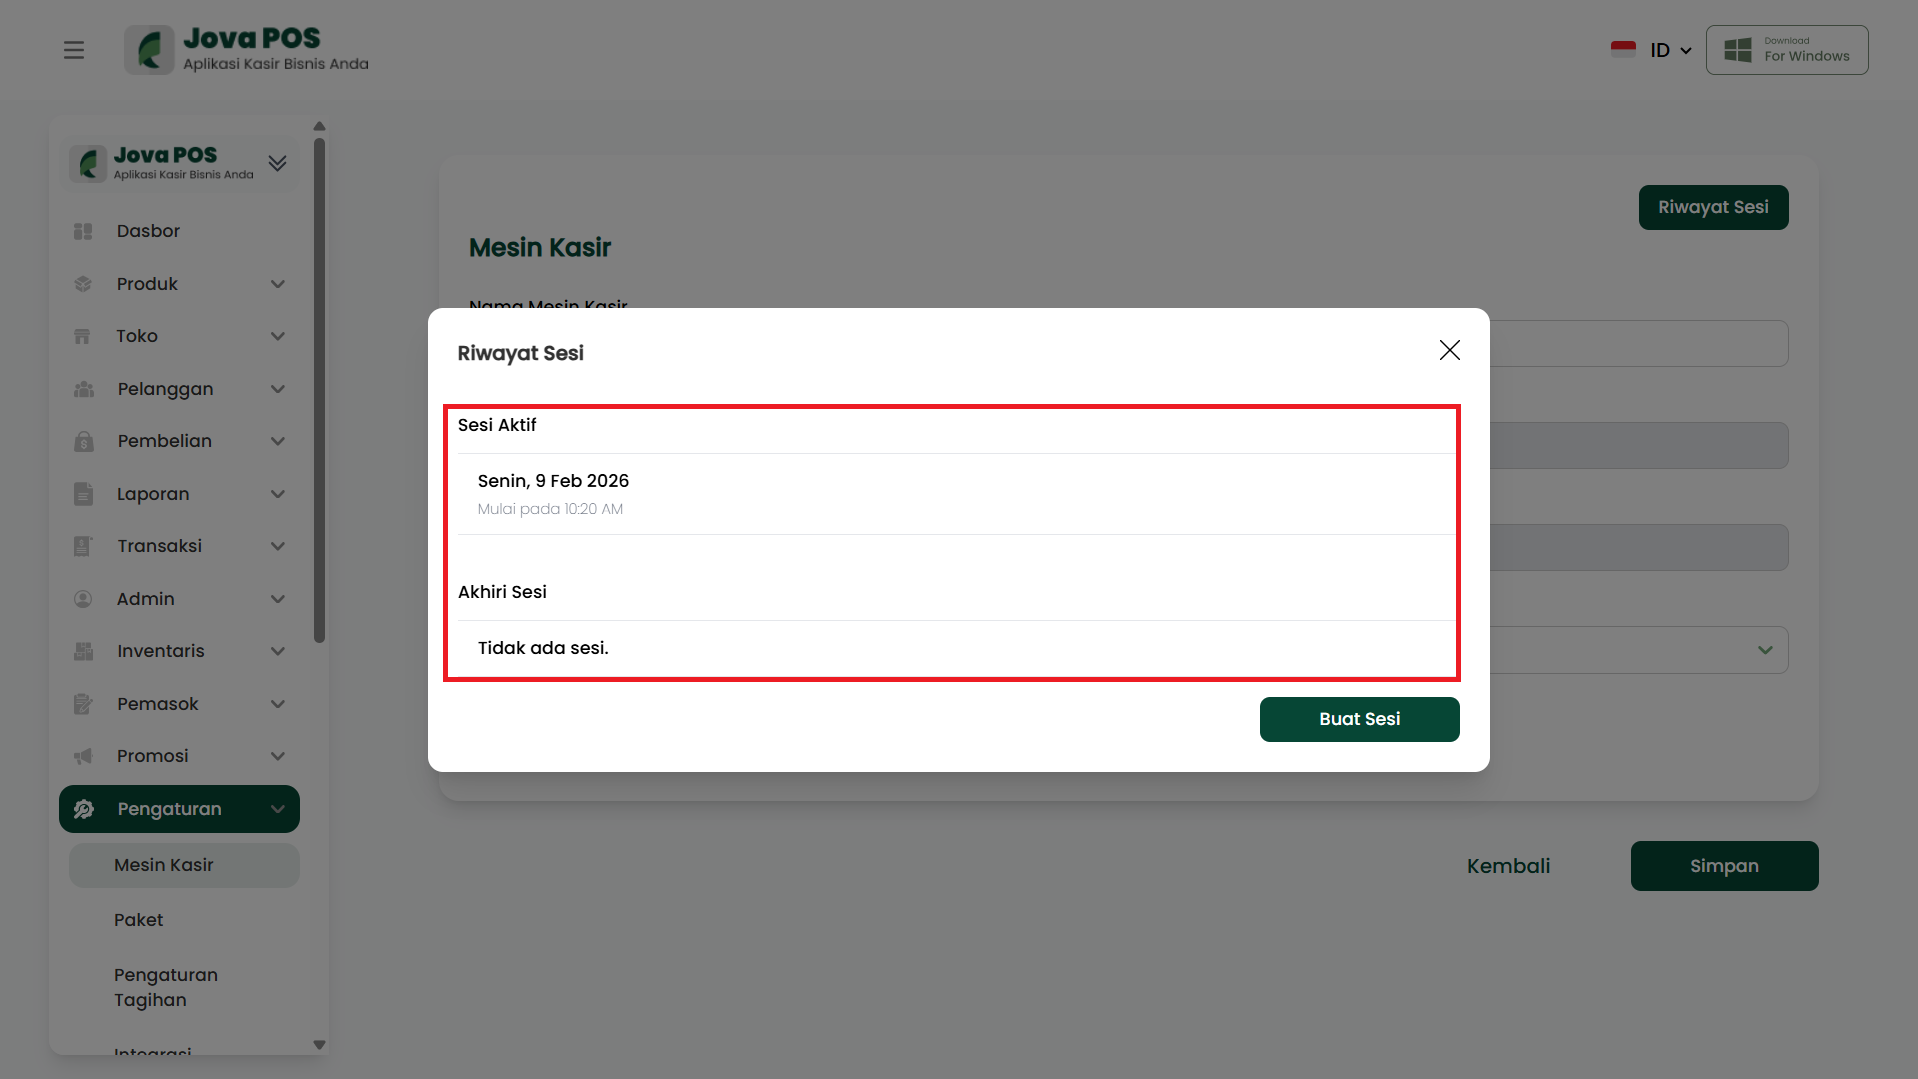
In the Session History section, you can view the current active session status and previous session history.
Steps:
- Active Session: Displays the currently active session, along with the start date and time.
- End Session: If the session is finished, click the End Session button.
Session History Example:
- Active Session: Monday, 9 Feb 2026, Started at 10:20 AM.
- End Session: No session.
4. Managing Cash Registers
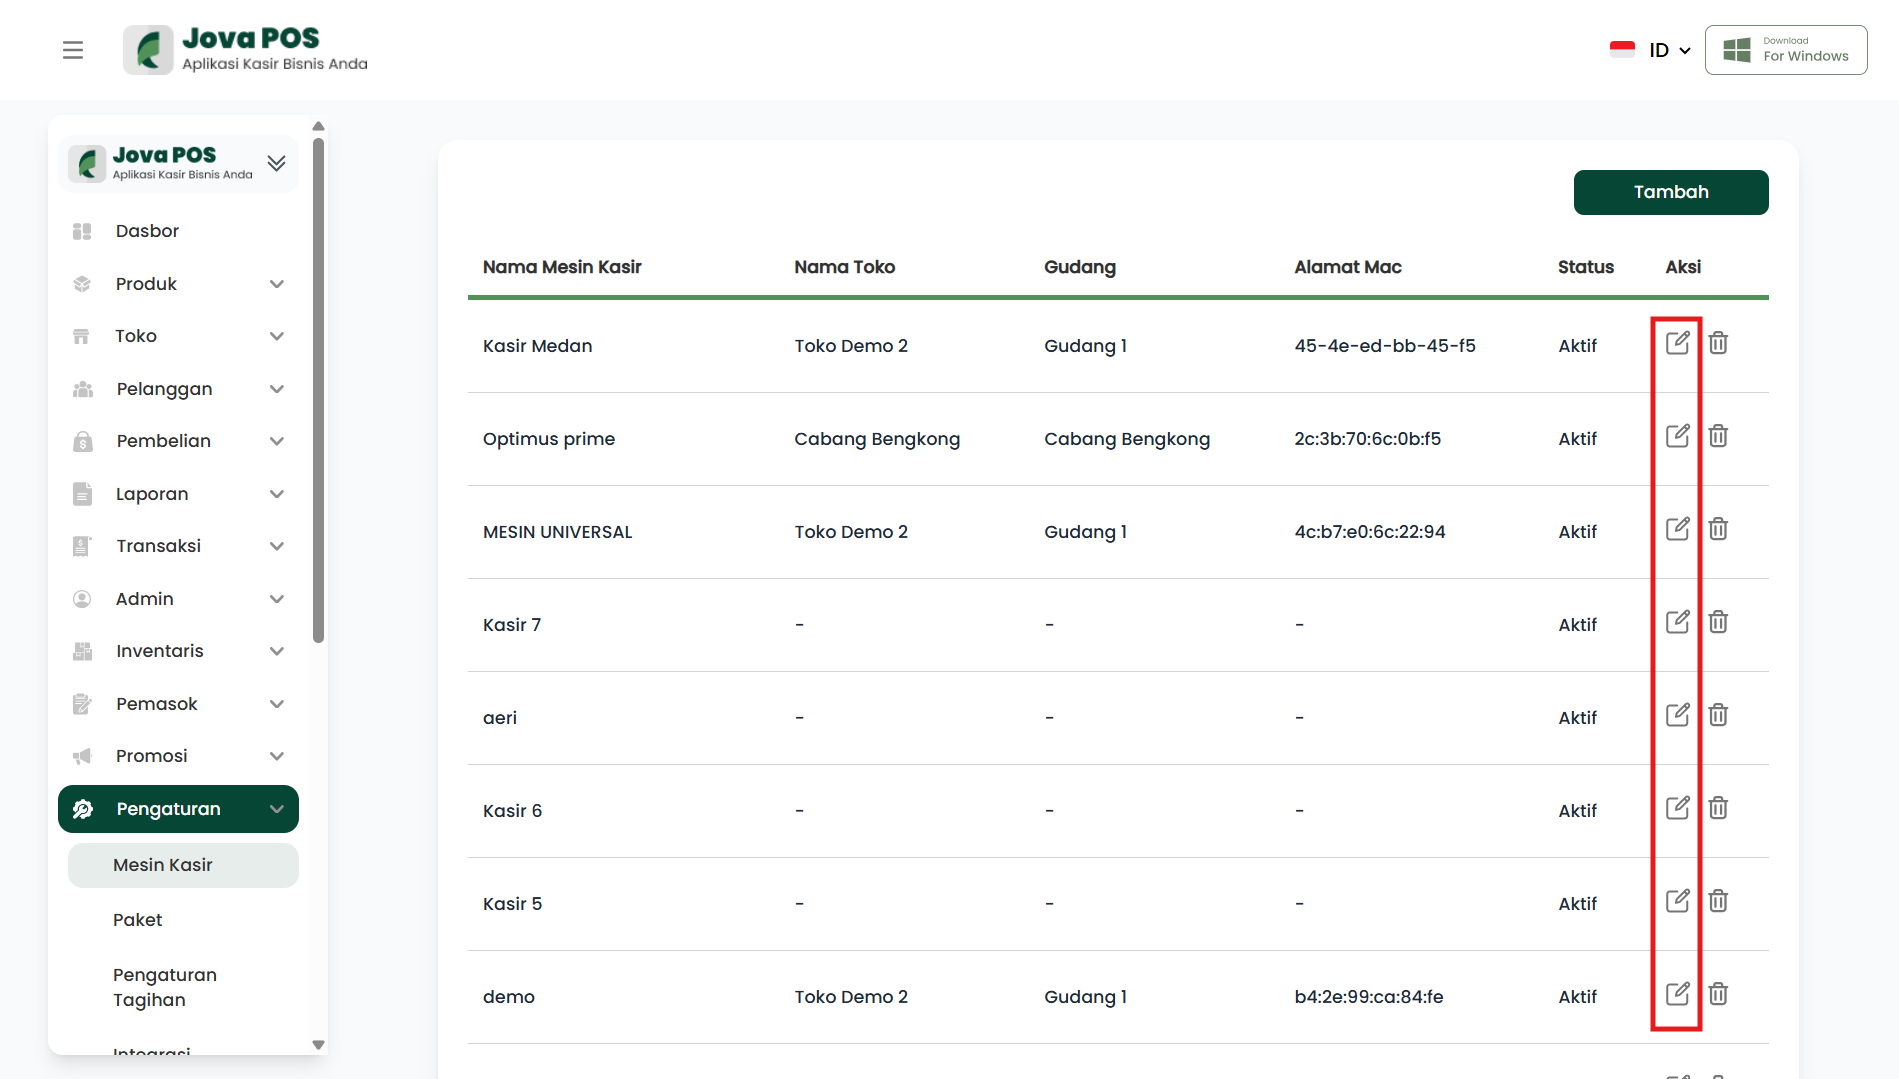
To edit or delete a cash register, click the Edit or Delete icon in the Action section of the cash register you want to modify.
Steps:
- Select the cash register you want to edit or delete.
- Click the Edit icon to change cash register information.
- Click the Delete icon to remove a cash register that is no longer needed.
Cash Register Management Example:
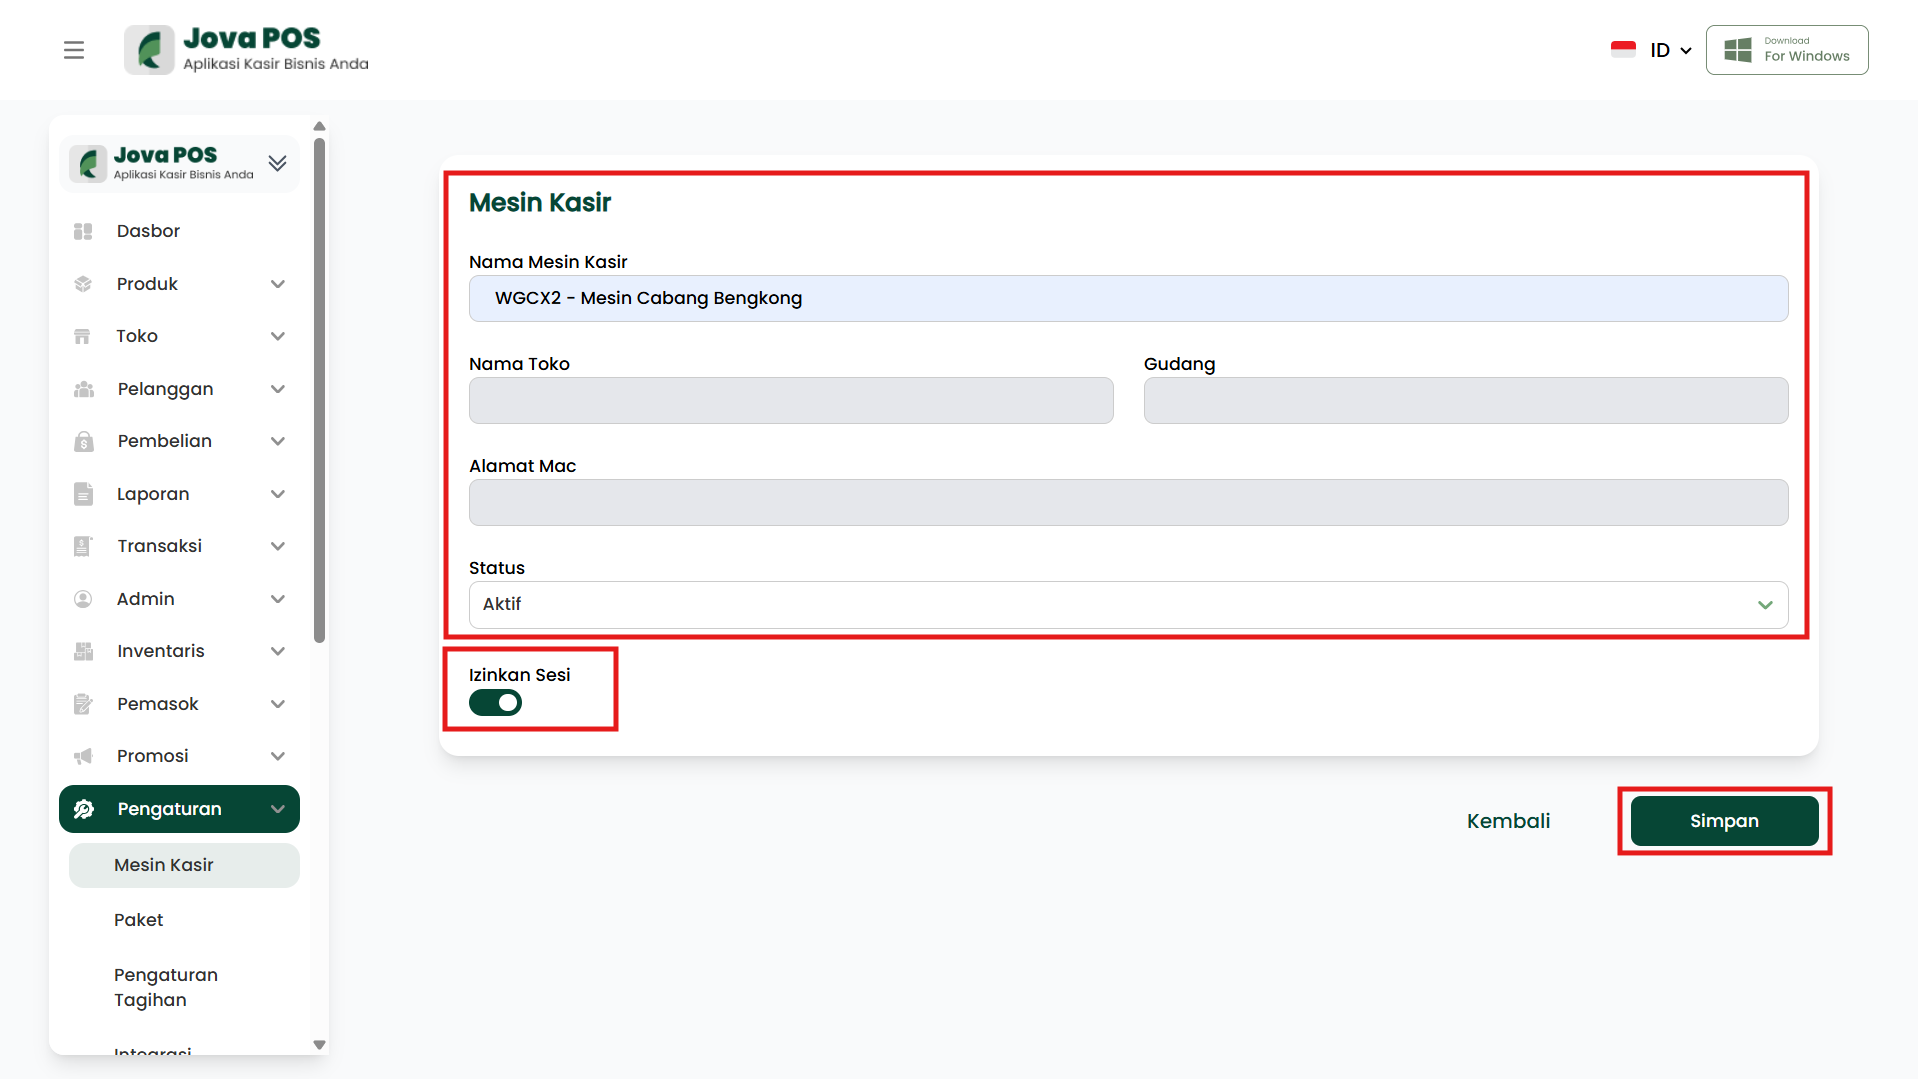
5. Adding a New Cash Register
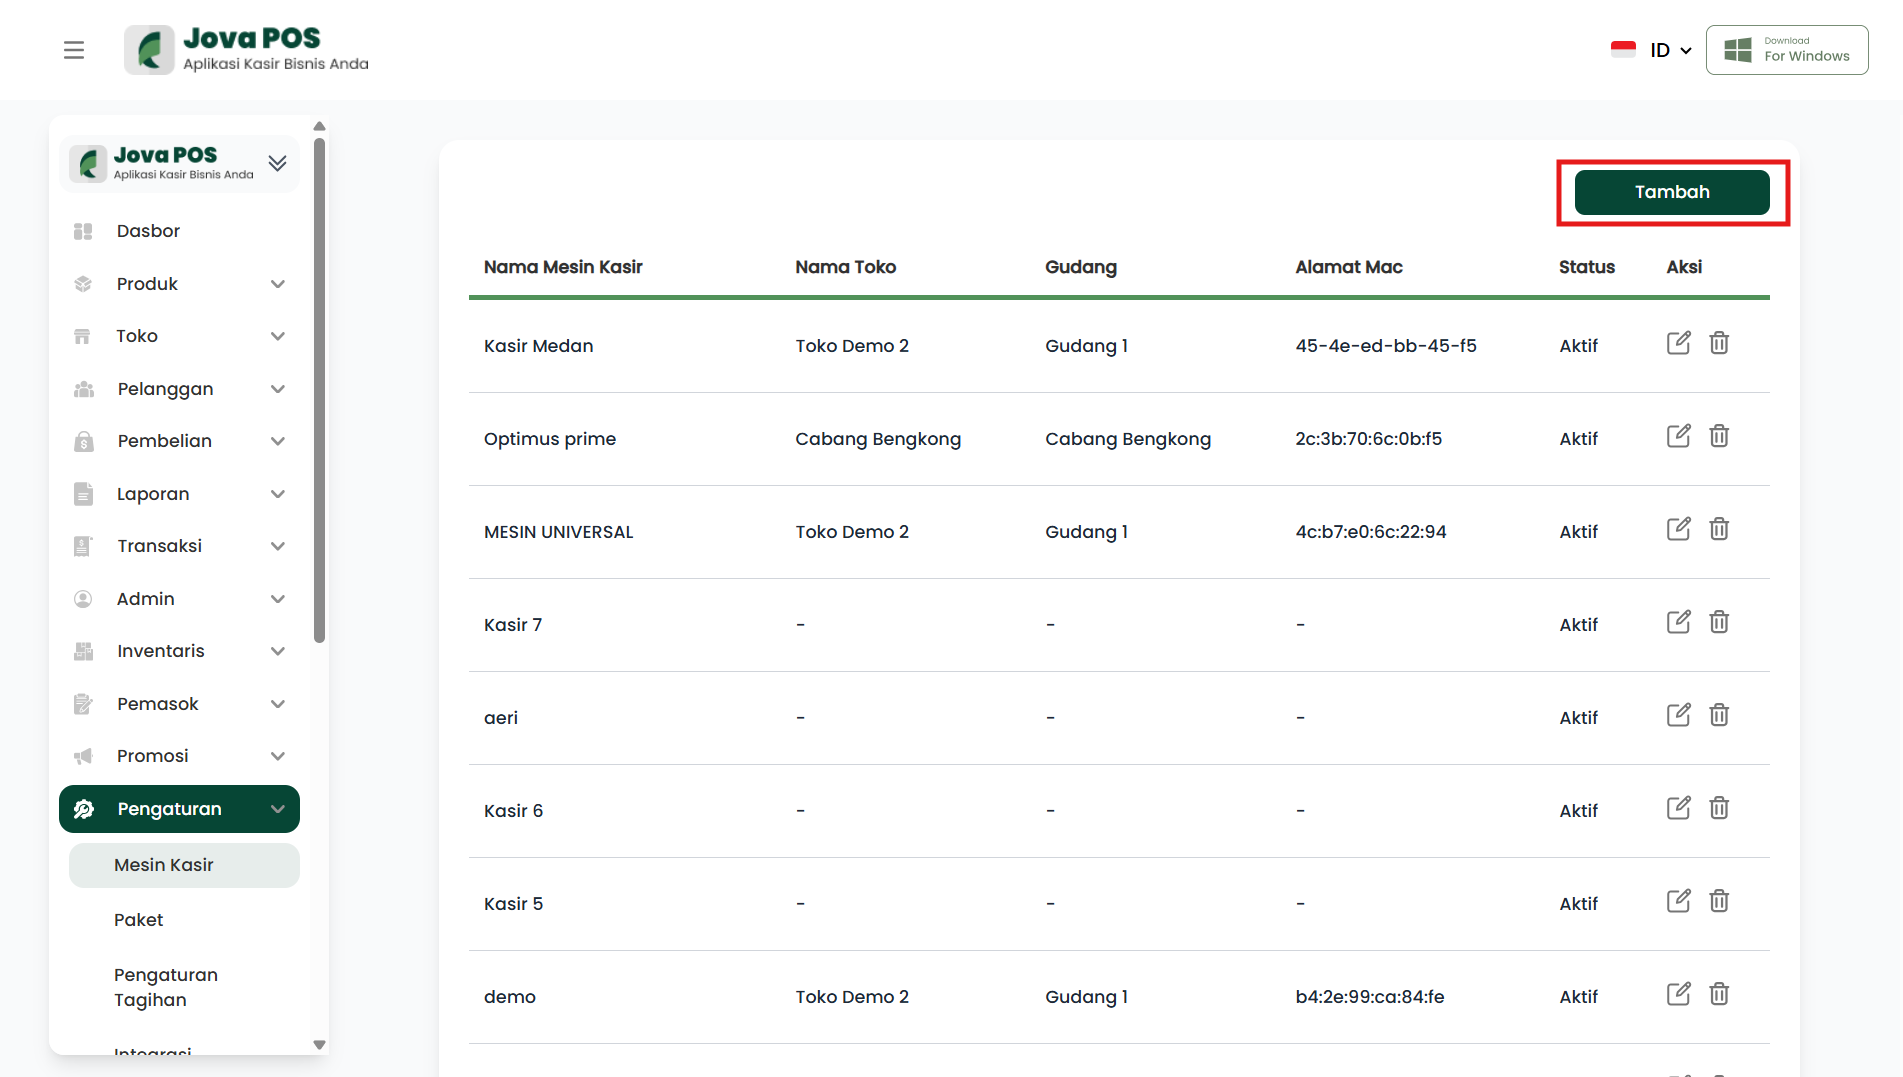
If you want to add a new cash register, click the Add button located in the top right of the cash register page.
Steps:
- Click the Add button.
- Fill in the new cash register information, such as Cash Register Name, Store Name, and MAC Address.
- Click Save to add the new cash register.
Add Cash Register Example:
By following the steps above, you can easily manage cash registers in Jova POS, from creating new sessions to managing existing cash registers.